Category Archives: DIY

Don’t mow your lawn yet – there might be some treasures waiting for you …

Posted on in All, DIY.

Now starts the perfect time window to gather flowers for your creative projects. Before you go out and mow your grass or work in your flower beds take a look around and see if there are any cute looking flowers, grasses or leaves that you want to gather before going on with your gardening chores. Something that would end up getting mowed off or pulled anyway. And of course you can also gather some of the flowers of plants you want in your garden – just keep in mind to leave enough for pollinators and spreading seeds.

The same approach goes for gathering flowers in the wild or public space if you don‘t have a garden or just doesn‘t have anything blooming in it. If you can: Ask for persmission and then gather responsibly.

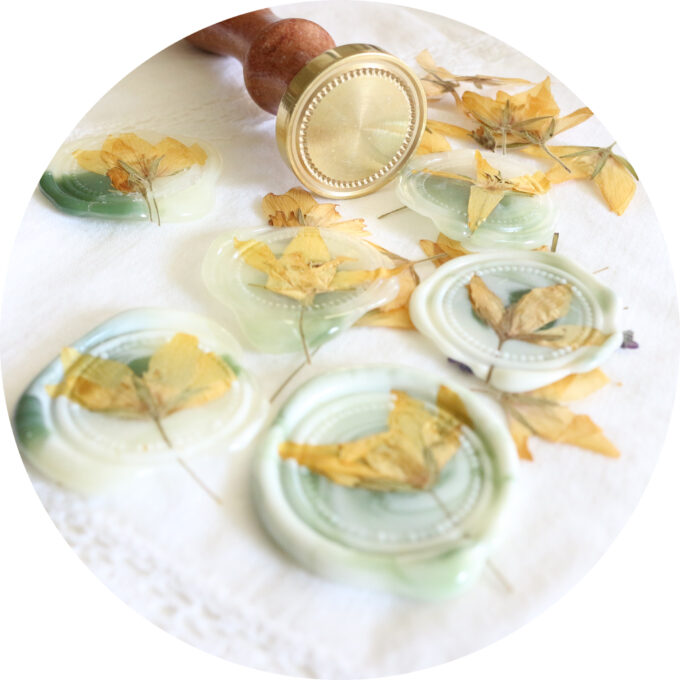
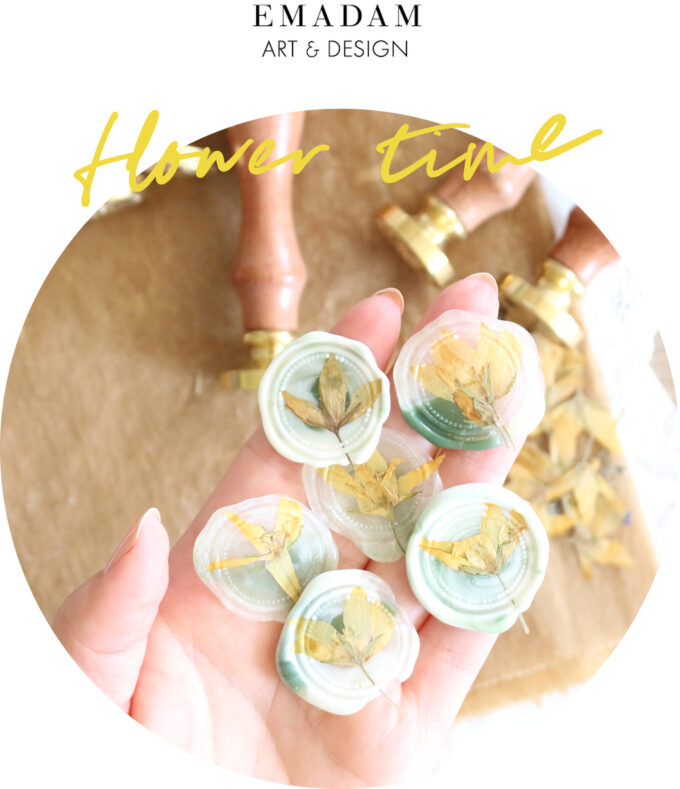
For example the yellow flowers you see in the pictures are the flowers of a garden thug that is hard to control. We have to pull a lot of it every year otherwise it would take over EVERYTHING and destroy all the variety we try to build up for bumble bees, butterflies and everyone else. Before pulling some of the plants I gathered a few flowers and put them, with some parchment paper, in a book and let them dry.

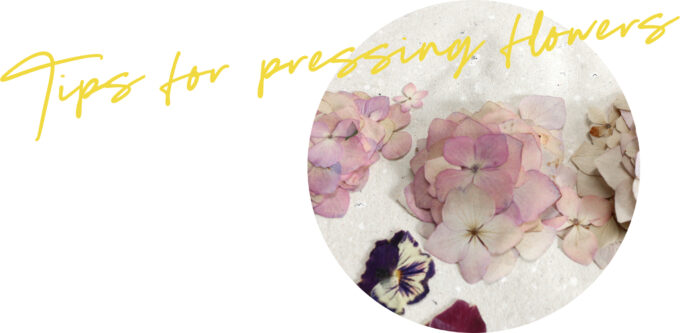
Here are some tips for you if you want
to gather and dry some flowers too:

  1. Gather flowers that are dry, without
    rainwater, morning dew or any other kind of
    moisture on them.
    That makes the drying process way more difficult and also can lead to mold.
  2. Flowers that are delicate and thin are easier to dry than flowers that are very thick. For example pansies, poppies and hydrangeas always dry up very good with lovely colors. Dahlias on the other hand tend to mold in the middle because of their thickness. However you can dry the individual petals of a dahlia and might be surprised how intense the colors are.
  3. When drying and pressing flowers you might think the more pressure the better. I made the experience that to much pressure is bad and flattens out everything so much that it‘s hard to work with. Especially delicate flowers. So I recommend putting enough pressure on it that it gets pressed but not so much that you can see a ghost through the dried flower. ;)
  4. You don‘t really need special equipment for drying and pressing flowers. I use some regular parchment paper (optional) and old heavy books – that‘s all. Just make sure to use a piece of parchment paper on top and bottom of each flower load. If you don‘t use parchment paper your books can get stained from the flowers. If you don‘t mind, leave away the parchment paper.

On top of my filled book I put a couple more books and then just let everything to dry for a week or two. Depends on the weather (with more humidity it might take longer) and what kind of flowers you‘re pressing.

Other options for drying and pressing are a bookpress (careful with the pressure here), some stacks of wooden boards, cardboard or you get one of those fancy flower presses which is nothing else than wooden boards with some finnboard in between and a „belt“ around it that you use to apply pressure. I never tried one of them so I can‘t tell you how good they work. But I‘ve seen other people use them and they get the same results as I with my books so decide for yourself. And if you need your pressed flowers in a short time put your flowers between two sheets of waxed paper, put a tea towel on top and use your iron to dry them. You may have to play around with the settings to get it right. Too low and it won‘t work, too high and you might get brown/dark spots. So start somewhere in the middle and adjust from there.

  1. And the last tip: Not every flower might come out the way you think. Some completely change colors (for better or for worse). I had that happening with tulip petals and poppies and they looked absolutely gorgeous. Some might loose a lot of their color and only have a pastel color left and some might get brown and ugly. You can sometimes prevent the last one from happening when being careful when you pick them but not every flower works the same.

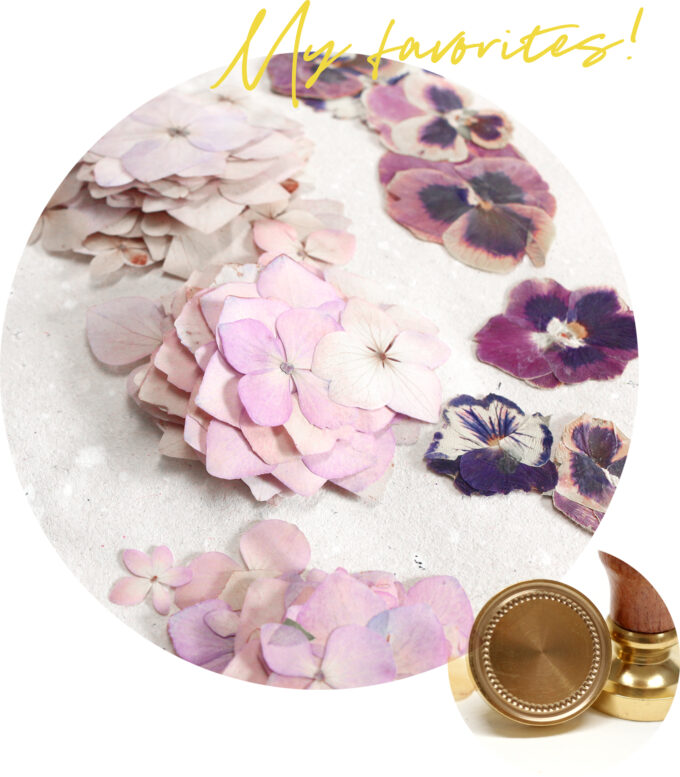
Some of my favorite flowers to press and use in projects are: Pansies, daisies, hydrangea, sweetpeas, poppies, anemones, forget-me-nots, cosmos, babies breath, delphinium, calendula.

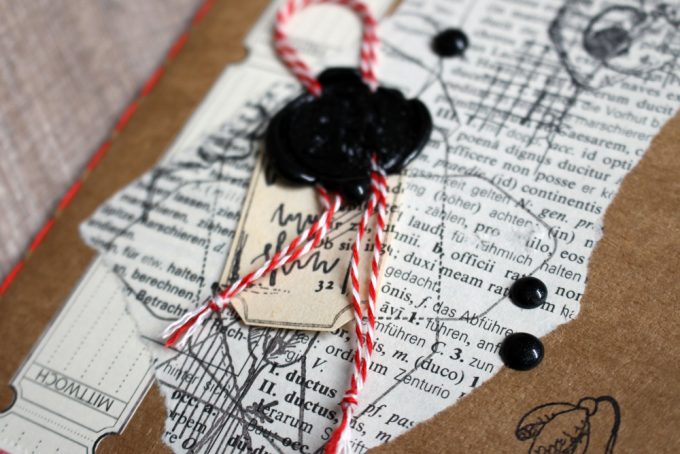
And by far my favorite wax seal to combine them with is my „dotted circle“ wax seal. I designed it especially for something like this: where you want to show of something in the middle but still want some imprint of the wax seal itself. Like the design of the wax seal is framing the flower in the center.

I hope you enjoyed this little field trip into the world of pressed flowers and I would love to see your creations when you try it out!

I wish you a great day and a happy weekend!

Much love,
Franziska

Tutorial: Christmas card with dried flowers

Posted on in All, DIY, Rubberstamps, Stationery.

Hey guys, let’s make an easy christmas card with some dried flowers and a piece of ribbon.

First you want to cut your piece of dried flower to the size you want and optional, give it some color or glitter by dapping some on. I like to dap some color/glitter on the top of each branch so you have a little sparkle but you can see the original color on the rest of the branches. Set the flower aside and let it dry.

I used off-white cardstock as my base and cut a piece of light brownish cardstock to size to use as my second layer. I always cut the second layer a little bit smaller than my base so I get a nice border when attaching it to the base later.

With a candy cane stamp and some white stamp ink, I stamped a simple pattern on my second layer and added a piece of ribbon to it, which I attached with double-sided adhesive tape.

On a smaller piece of the off-white cardstock I stamped “Frohe Weihnachten” (which means “Merry christmas” in german) in a light brown ink and to give it an interesting shape I cut off all four corners of my banner. On the back I used some double-sided adhesive foam rubber.

Use a dap of glue – I used bookbinding glue – to secure your flower piece to your card, hold it in place and adhere your banner over the cut end of your flower piece.

Put some glue (again I’m using bookbinding glue but you can also use the double-sided adhesive tape you used for the ribbon or a glue stick) on the back of your second layer and adhere it onto your base card.

Your card is ready to make someone else happy!

Love,

-Ema-

Sealing a small package

Posted on in All, Art, DIY, Packaging Design, Rubberstamps, Stationery, Work in progress.

No matter if it’s a small or a big package – sealing them with wax is so much fun! In this video I packed up a notecard set in a semi-transparent paperbag, decorated it with a piece of an old bookpage, some rubber stamps and a red/white twine and sealed it with a black wax seal were I put a small flake of roségolden metal on.

Because of the roségolden metal flake some of the details of the seal get a little bit lost but I don’t think it derogates it.

Love,

-Franziska-

Freebie: Pattern with christmas stockings

Posted on in All, DIY, Freebies, Graphic Design, Illustrations, Pattern, Stationery.

The last few days I have repeatedly drawn christmas stockings to provide a new freebie for you guys. From a lot of christmas stockings I now made a pattern that you can download, print and use as wrapping paper.

Of course you can do much more with the pattern. You can make small bags, envelopes, cards or use it as a cover for a booklet. You also can use it as a coloring page or a mood tracker. Or you cut out the single chistmas stockings and make a garland out of them to decorate a table in your home.
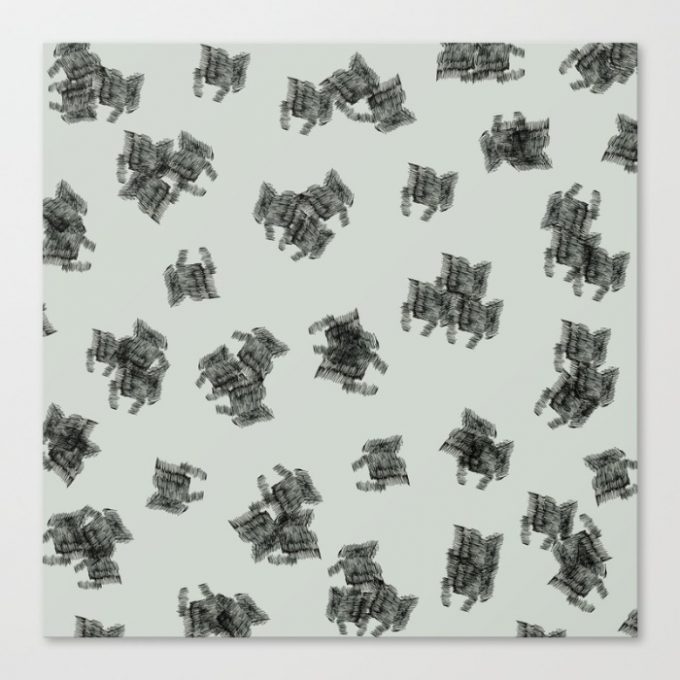
In addition to a neutral black version of the pattern – which is particularly suitable for a coloring page – there are different single- and multicolored versions of the pattern available. I already used my first prints as wrapping paper for small gifts.

Have fun printing and coming up with your own ideas on how to use the pattern. And I hope some of you will show your creations on instagram or elsewhere.

Love

-Ema-

DIY: Journal with small stitching

Posted on in Bookbinding, DIY, Rubberstamps, Stationery, Work in progress.

bookbinding, kleinstichtige heftung

In this DIY tutorial I will show you how you can make your own journal with small stitching. It is similar to the exercise book binding.

You will need:

  • cardstock for the cover
  • paper for the journal, 15 sheets
  • scissors
  • two needles
  • a piece of cardstock
  • pen
  • ruler
  • awl
  • bone folder
  • thread
  • beeswax
  • a small weight
  • cutter
  • self-healing mat
  1. Make one section out of the 15 sheets and fold it in half by hand. Fold the cardstock in half with the help of the bone folder.
  2. The piece of cardstock should have the same height as the cover. With pen and ruler mark the positions where you want the holes to be.
  3. Put the cardstock with the marks into the middle of the section and with the awl make your holes. Repeat with the cover.
  4. The thread must be three times the height of the cover. Wax the thread with some beeswax and put a needle on every end of the thread.
  5. Put the cover around the section, lining up the holes. With the section openend up in the middle, put the small weight on one side so your journal won’t slip while you’re working. (The foldback clip is just for making it easier to photograph the tutorial.)
  6. Put one of the needles through the first hole. The thread should have an equal length on both sides.
  7. Put the second needle through the second hole.
  8. Pull all the thread from the inside of the journal through the second hole. Both needles should be on the outside now.
  9. Put the first needle through the second hole from the outside to the inside and make sure the thread is tight. Pay attention to not pierce the thread that is already laying in the whole with yur needle. Otherwise you won’t be able to tighten your thread when needed.
  10. The whole binding is made this way. One needle goes from the inside to the outside and the other through the same hole from the outside to the inside and then pull the thread tight. Repeat ’til only two holes are left.
  11. When you have two holes left you will only need the needle on the outside for the rest of the binding. If you want to you could finish the binding with the same method but I like to change it here because the knot and both ends of the thread won’t be that near to the edge of the finished journal.
  12. With the needle from the outside you have to go through the second to last hole to the inside and from there through the last hole out again.
  13. From the outside go through the second to last hole again. Now you won’t need the needles any more so you can put them away.
  14. Pull the thread tight and make a square knot.
  15. With the scissors cut the ends of the thread, leaving half of an inch to secure it won’t come undone. Here you can see why I don’t like to make the knot at the last hole: the ends of the thread would stick out of the bottom of the journal.
  16. Optional: You can cut the three open edges of your journal with cutter and a metal ruler if you want to. I also rounded the edges of my journal.
  17. Optional as well: I decorated my cover with different elements. With a sheet of this notepad, some pieces of old books, rubber stamps, an old stamp, some bakers-twine and sealing wax.

Have fun making your own journals!


Love

-Ema-

Weekly pattern

Posted on in Art, DIY, Graphic Design, Pattern, Textiles.

“Mark making” is the pattern theme for this month over by Frau Müller. A theme that has a special meaning for me because it´s a big part of my work as an artist.

With a vocabulary of different strokes, techniques and marks a unique artwork comes together. It’s a play with layers that interact with each other and one mark leads to another.

For this weekly pattern I decided to stay with just one stroke. In my usual artwork I often make this kind of stroke in pencil. Sometimes I change to nib and ink or fountain pens.

The black ink really shows the intensity of the strokes. The layering of the strokes is clearly visible. In the mood of some experimental playtime I scanned, digitally repeated and layered the strokes. One time with a white background and the second one has a light moos-green background.
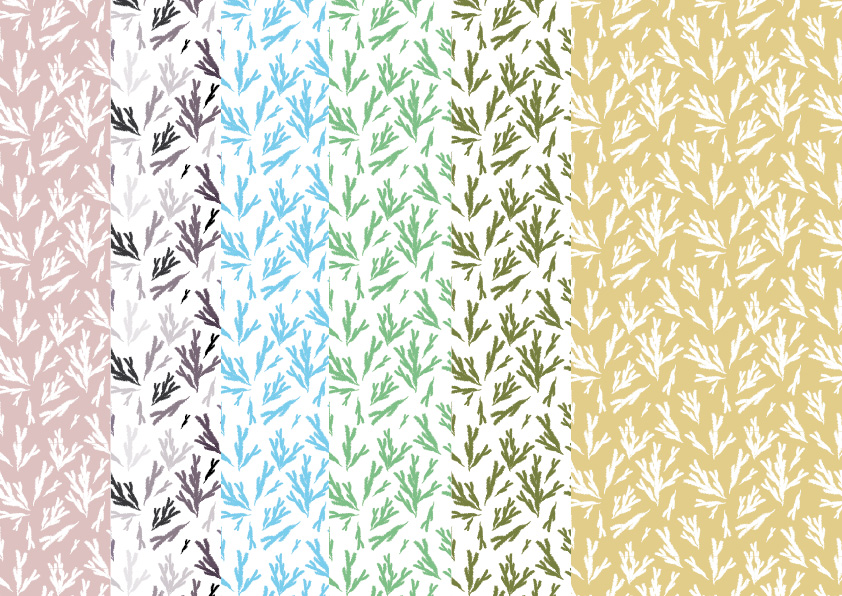
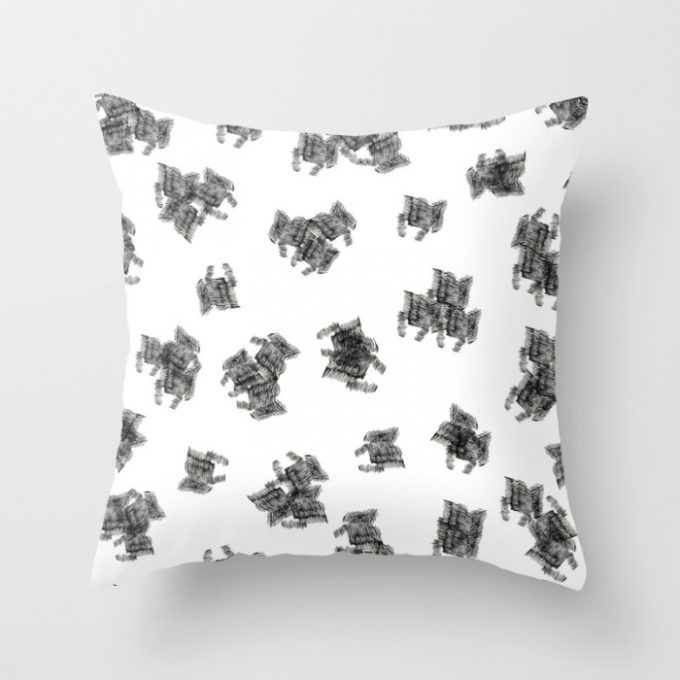
I’m loving the pattern with the white background. I can imagine it as a fabric for pillows or curtains. And I like the intense contrast. Besides I had the idea that it would be possible to individualize the fabric with colorful extra layers.


Love

-Ema-

Merry St. Nicholas Day

Posted on in Art, Bookbinding, DIY, Freebies, Graphic Design, Illustrations, Packaging Design, Pattern, Stationery, Wallpaper.

tannenmuster vorschau

In our home it´s a tradition to make a little gift at St. Nicholas Day and I would like to incooperate this tradition into my blog. Because of that you will get a hand-illustrated pattern as a freebie today.

To match the season it is a pattern of little christmas tree branches in different sizes and colors. You can use the pattern for little christmas gifts, making envelopes or little (flat)bags or use the pattern as a background in other projects like your scrapbooking album. Please respect that the pattern are made for personal use only.

I made the pattern in different colors, so that hopefully everybody of you find a color that he or she likes. Lightgreen, Lightblue, Mossgreen, Black, Greytones and Lilac-Grey. And the same colors Lightgreen, Lightblue, Mossgreen, Black, Greytones, Lilac-Grey are also available in a different size of the pattern.

If you aren´t afraid of printing with some more ink onto your paper, then there are also some more variations. These colors have white branches and a colored background. You can have Old rose, Sand, Black und Grey. And of course there is also a option with another pattern size for Old rose, Sand, Black, and Grey.

I hope you have a great St. Nicholas Day and have fun with the pattern! And it would be awesome if you would link to my blog if you made something with the pattern.

Love,

-Ema-